
 |
Read my instructions after the cut!
What you'll need:
- a canvas Darice 18-Inch-by-24-Inch Stretched Canvas, 2-Pack
- 4 or 8 packs of 24 count Crayons Crayons Crayola Crayons 24 Count - 2 Packs 52-0024-2 5200242, crayon great school
- duct tape
- a hair dryer
- super glue or a hot glue gun
- newspaper
- wrapping paper
- black paint (optional)
- puff paint (optional)
2) Fold pieces of duct tape over on themselves so that they become double sided and mount the crayons around the heart. I chose to do them in a rainbow pattern that repeated 4 times because of my 4 boxes of crayons. Depending on the size of your canvas and the size of your heart, you might use less crayons.
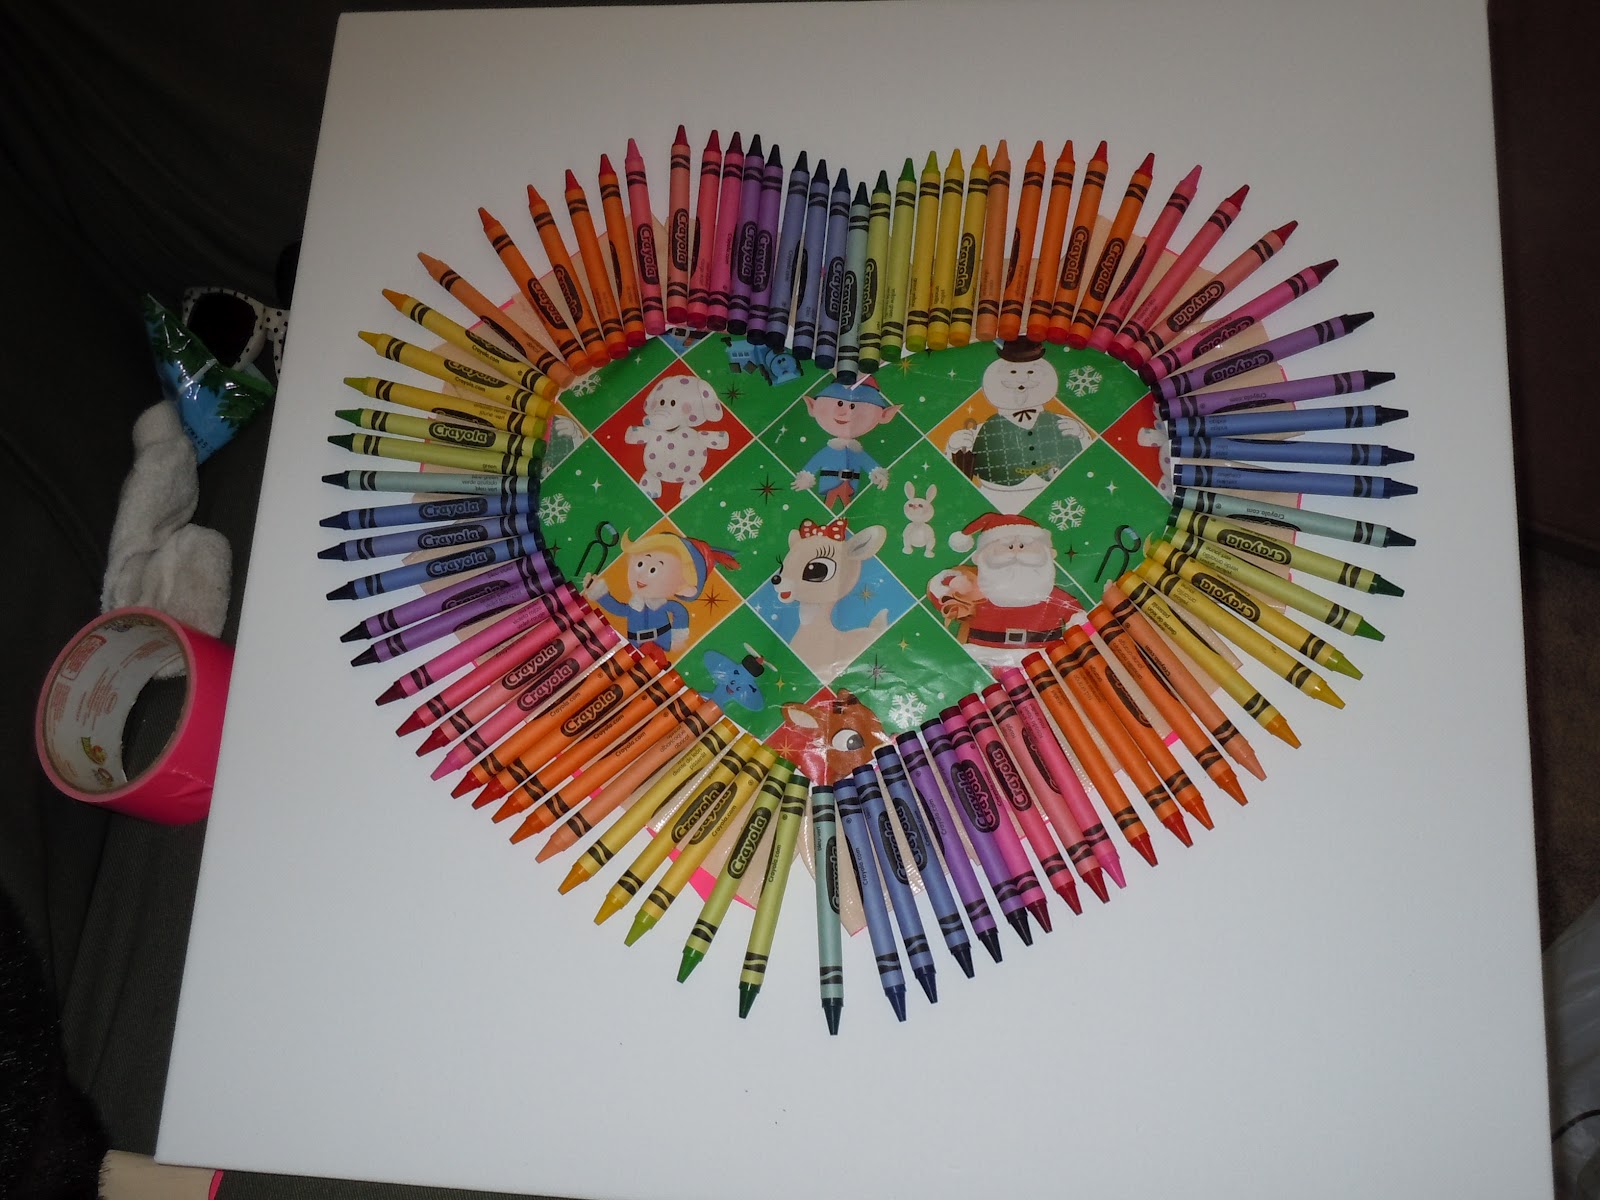
3) Layout newspaper and get your hair dryer ready. Slowly melt the crayons section by section using the heat of your hairdryer. It took awhile, but I melted on the low air option so that my crayons wouldn't move around much. Also, I turned the canvas as I went so that the section I was melting always faced down so that the melting wax would flow the right way. TIP: I'd recommend sticking to crayola crayons only simply because they tend to be fairly pure. I've heard of other people using off brand crayons and it just doesn't melt the same.
4) Let it dry. It probably only took 30 minutes or so.
Now at this point you have to make a judgement call. I felt that the melted crayons looked crummy and so I took them off. I had planned for this and that's why I had only duct taped my crayons to the canvas in the first place. If you are okay with the melted crayon look, you should glue them on at the very beginning and you should skip the next step.
 | ||
| I didn't like how the crayons looked dark and distorted; but, that's a personal preference. |
6) Take off the wrapping paper and you should have a nice clean heart in the middle.
Optional Step:
1) Paint the bottom of your little one's feet in black paint and make prints on the canvas. Unless your child is older, I don't recommend trying for hand prints. I learned that the hard way. Squishy was rocking the fists of steel.
2) Use puff paint to write their name and the year. I blurred out Squishy's given name and that's why the left half of the heart is a wee bit blurry.
OTHER IDEAS: put pictures in the middle, put prints of all your children or your whole family, or use is to frame your child's artwork.
Overall, the project doesn't take very long. I can't give a direct time estimate because I was busy with a crying baby every so often. Also, it took longer for me because one of my dogs decided to eat the crayons off the canvas, super glue and all. Why? I don't know; but, of course she did it the day we were taking it to my mom. I probably looked crazy at Rite Aid at 6:30 in the morning just buying a pack of crayons ;)
**This post contains affiliate links that help me to maintain the blog and allows me to continue to bring your new content.
I like what you did here. All I need right now is the crayons and I have a similar project planned based off this version. I like the way you used wrapping paper to protect the middle. :)
ReplyDeleteOh, I really like those. I have an extra canvas because Michaels had them buy 1 get 1 free last week. I might have to use those melted crayons I pulled off and the extra canvas to make one of those.
DeleteThanks for sharing!
Do you leave the paper on the crayons that you blow dry?
ReplyDeleteI did. There was no reason not to leave it on, plus taking the paper off of that many crayons would have taken forever. :)
Delete